This post describes how I built a vacuum dryer for my 3D printer filament; I also use it for drying silica gel.
DISCLAIMER: BUILD AT YOUR OWN RISK. THIS PROJECT USES MAINS VOLTAGE (110/220V) AND WILL KILL YOU IF YOU MESS UP. THIS IS FOR INFORMATIONAL PURPOSES ONLY. DO NOT ATTEMPT THIS PROJECT.
PLEASE NOTE: I am NOT providing a wiring diagram for this project. You require sufficient electronics skills to confidently and correctly assemble the parts described on your own.
ALSO NOTE: The 220V components used in this project have NO GROUND connections, so in my version of the project I grounded everything and everywhere I could think of.
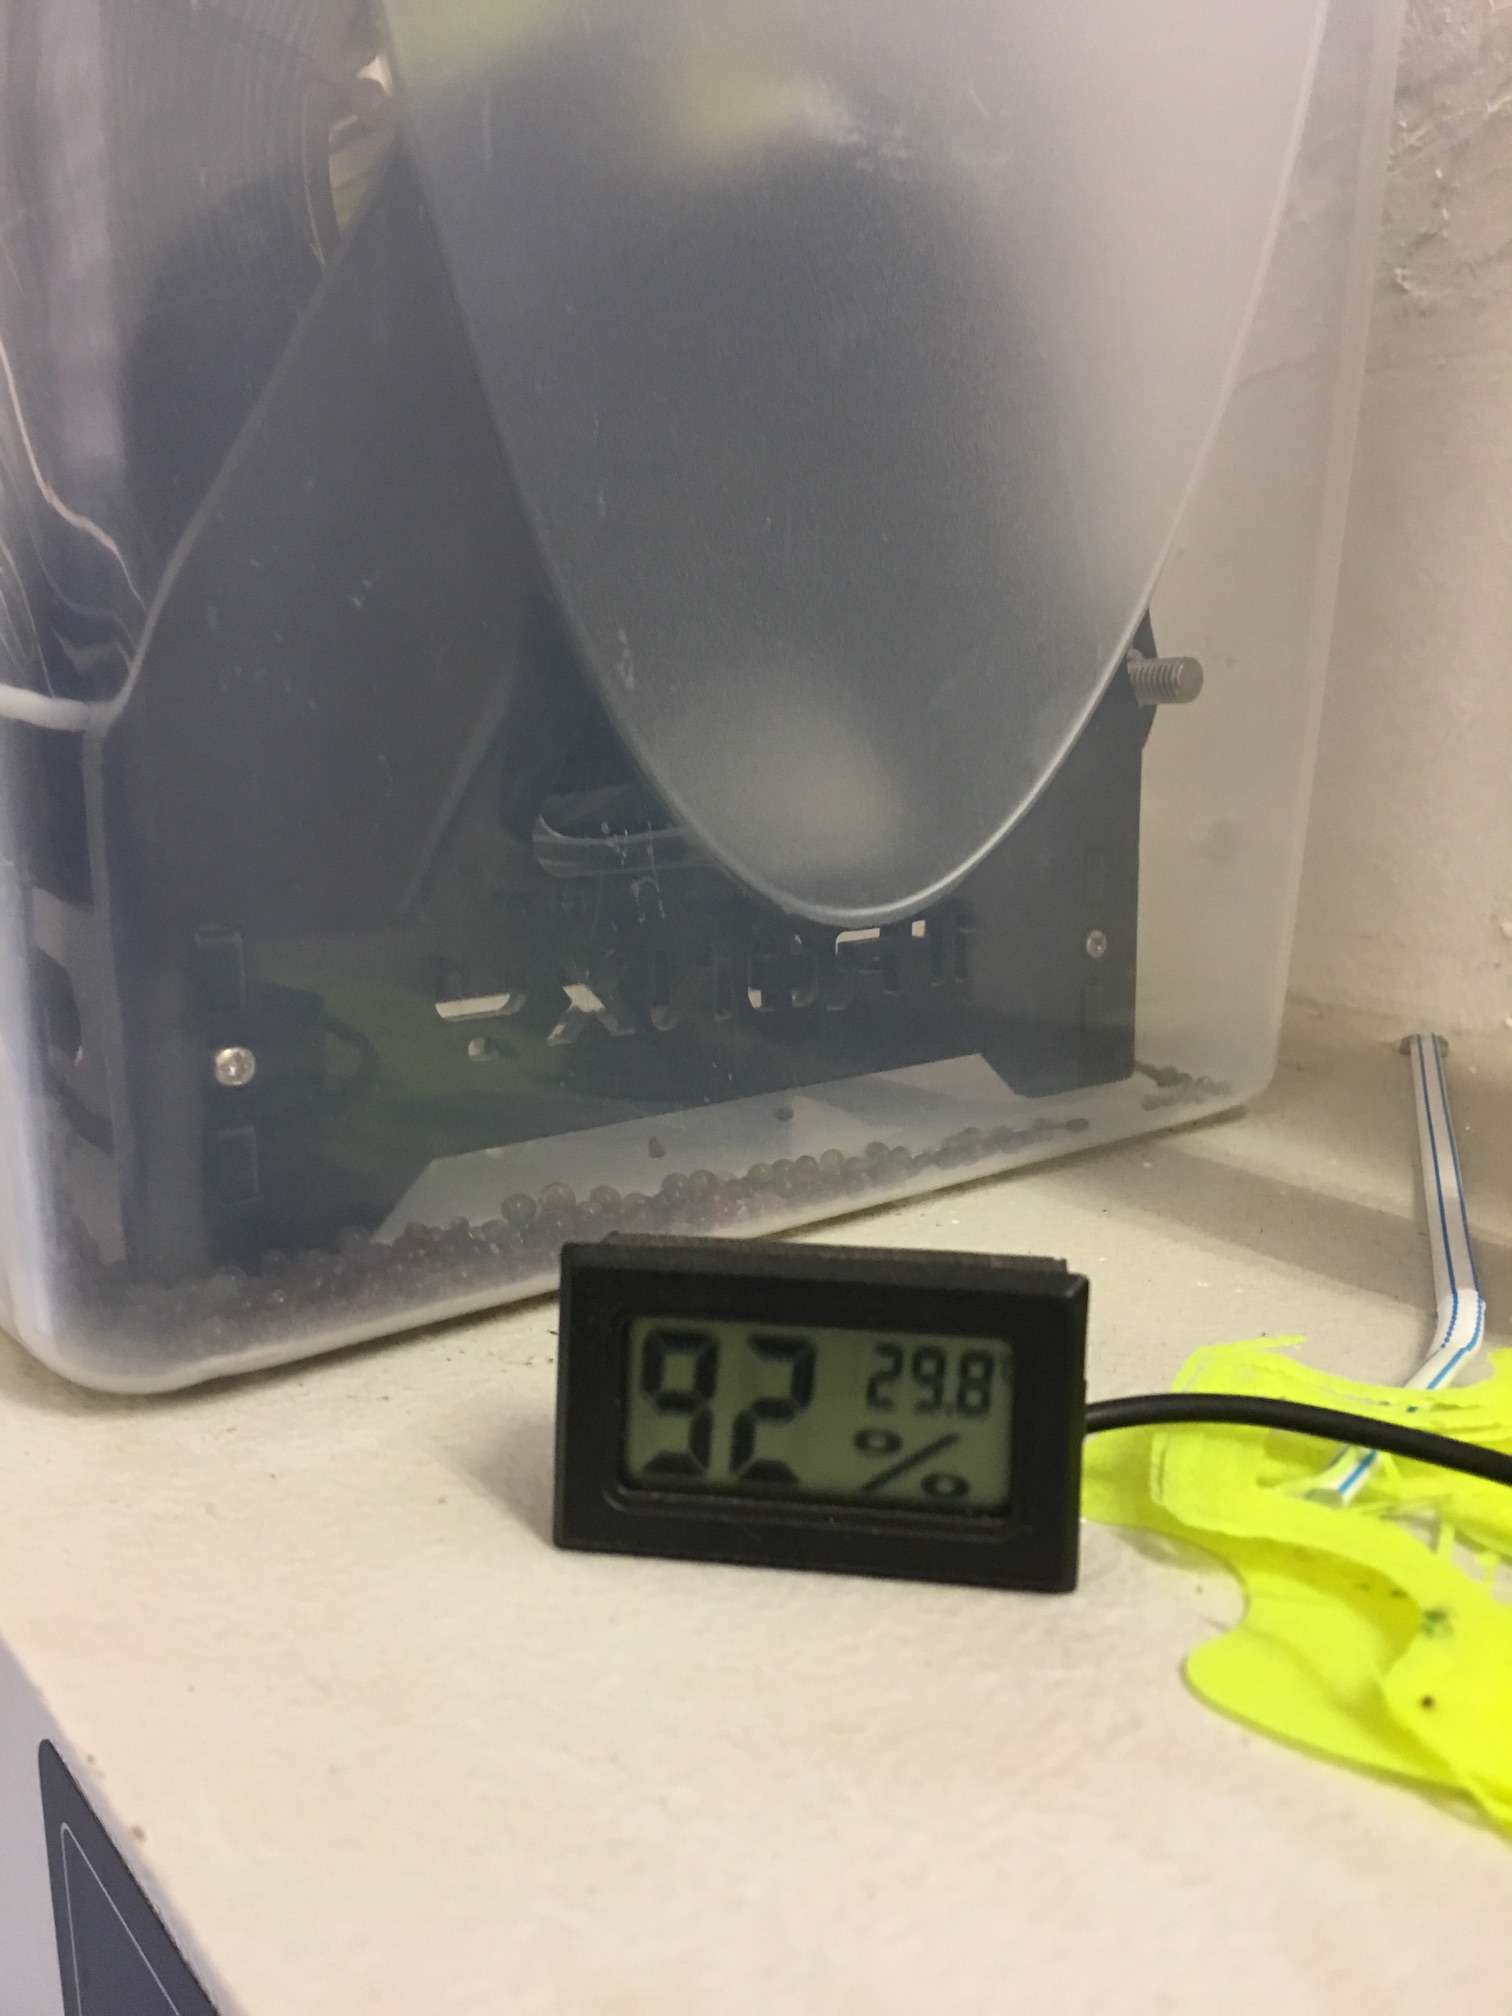
I need this because (at the time of writing) I live on the coast of east Africa, where the humidity can be high:
Parts list (see the photos):
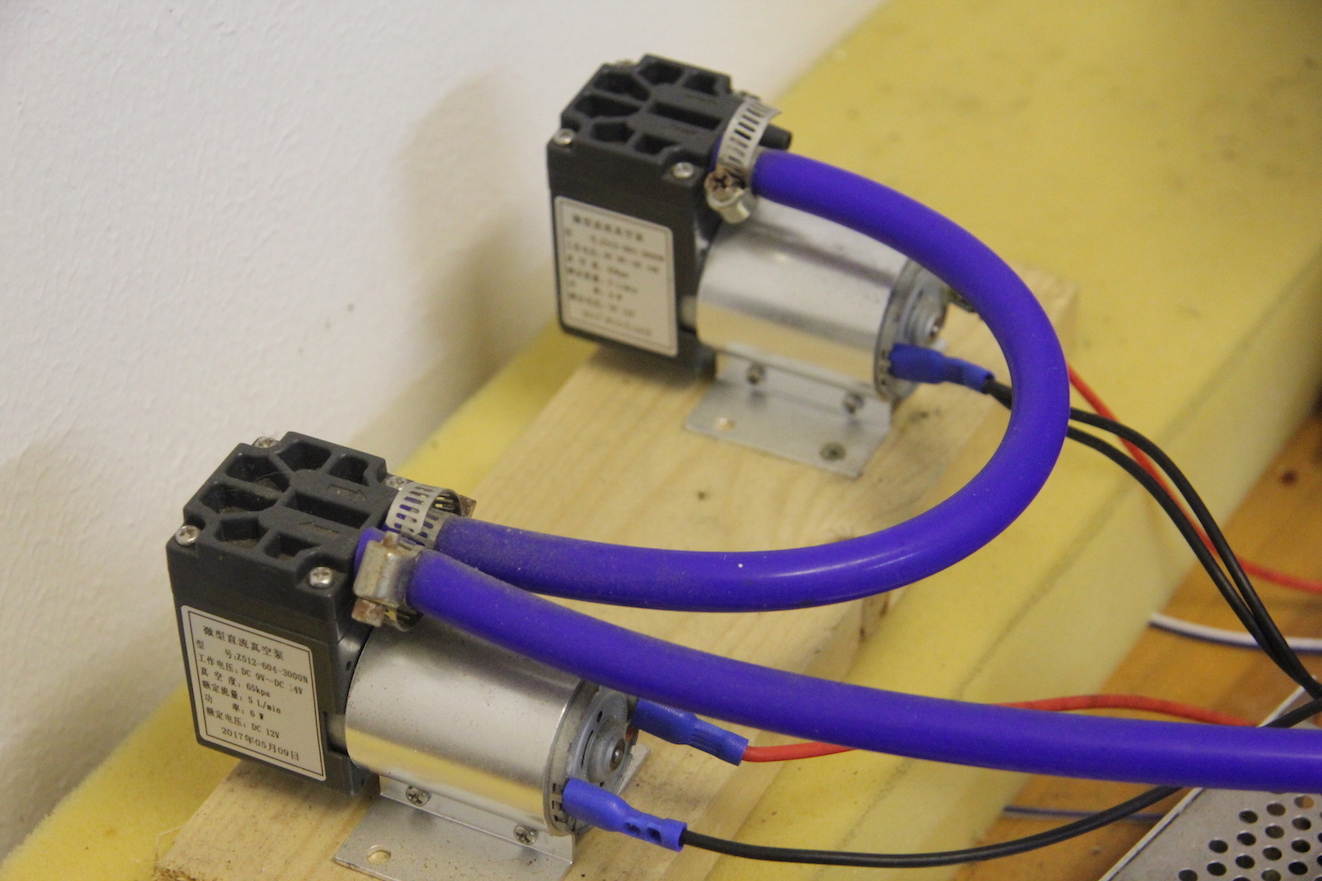
- Vacuum pumps (2): described on eBay as “DC12V 65-120kPa mini vacuum pump negative pressure suction micropump 5L/min”. These cost £10-20 and there seem to be lots of suppliers. The useful thing is that they can be put in series to create a stronger vacuum.
- 12V power supply for the vacuum pumps, I use the common LED ones.
- Vacuum pressure gauge: described on eBay as “Dry utility vacuum pressure gauge blk steel 1/4” NPT lower mount -30Hg/60PSI”. Cost currently around £5.
- Pressure cooker: I got one at a local Chinese supermarket, cost about US$25. Must be large enough to hold your filament spool(s) or whatever you want to dry, plus some extra space for e.g. small blocks of wood to keep your objects from touching the sides. Definitely get one with accessories you can take off (e.g. just bolted on) so you have some access holes - you need one for the vacuum gauge and a second for the internal temperature probe. You also need a port for the vacuum hose (that’s three total ports now) and still have the vacuum release mechanism working (or some other way to release the vacuum).
- Thermostat control switches (2): described on eBay as “12V/24V/220V digital LED temperature controller thermostat control switch probe”. I used 220V to match the heating elements below. Current cost about £4.
- Constant temperature heaters (4): described on eBay as “110V/220V PTC heating element thermostat heater plate 50/80/100/140W high power”. I think I used the 80W / 150C units to provide a little extra heating power, but the whole point of the system is to heat to a maximum of 100C. Current cost around £4 each.
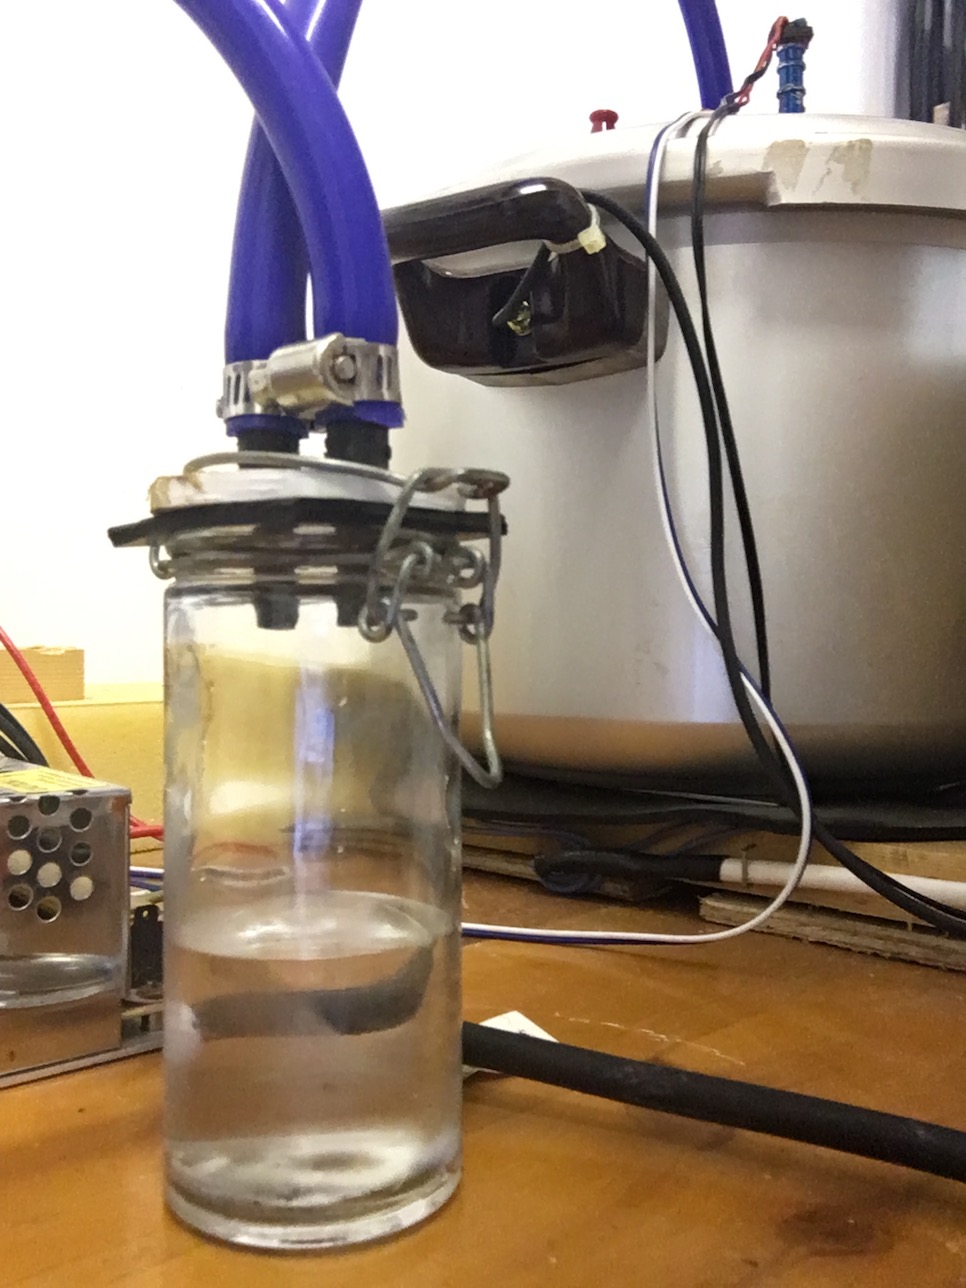
- A vacuum trap of some sort to catch the evaporated water, otherwise it goes into the pumps and probably degrades them.
- Various supplies - vacuum hose, silicone seal (I used high temp stuff because I had it), hose clamps and plumbing bits to go into the ports of the pressure cooker. Also wiring, heat shrink tubing, wood, rubber sheets if you want to do it all as shown in the photos.
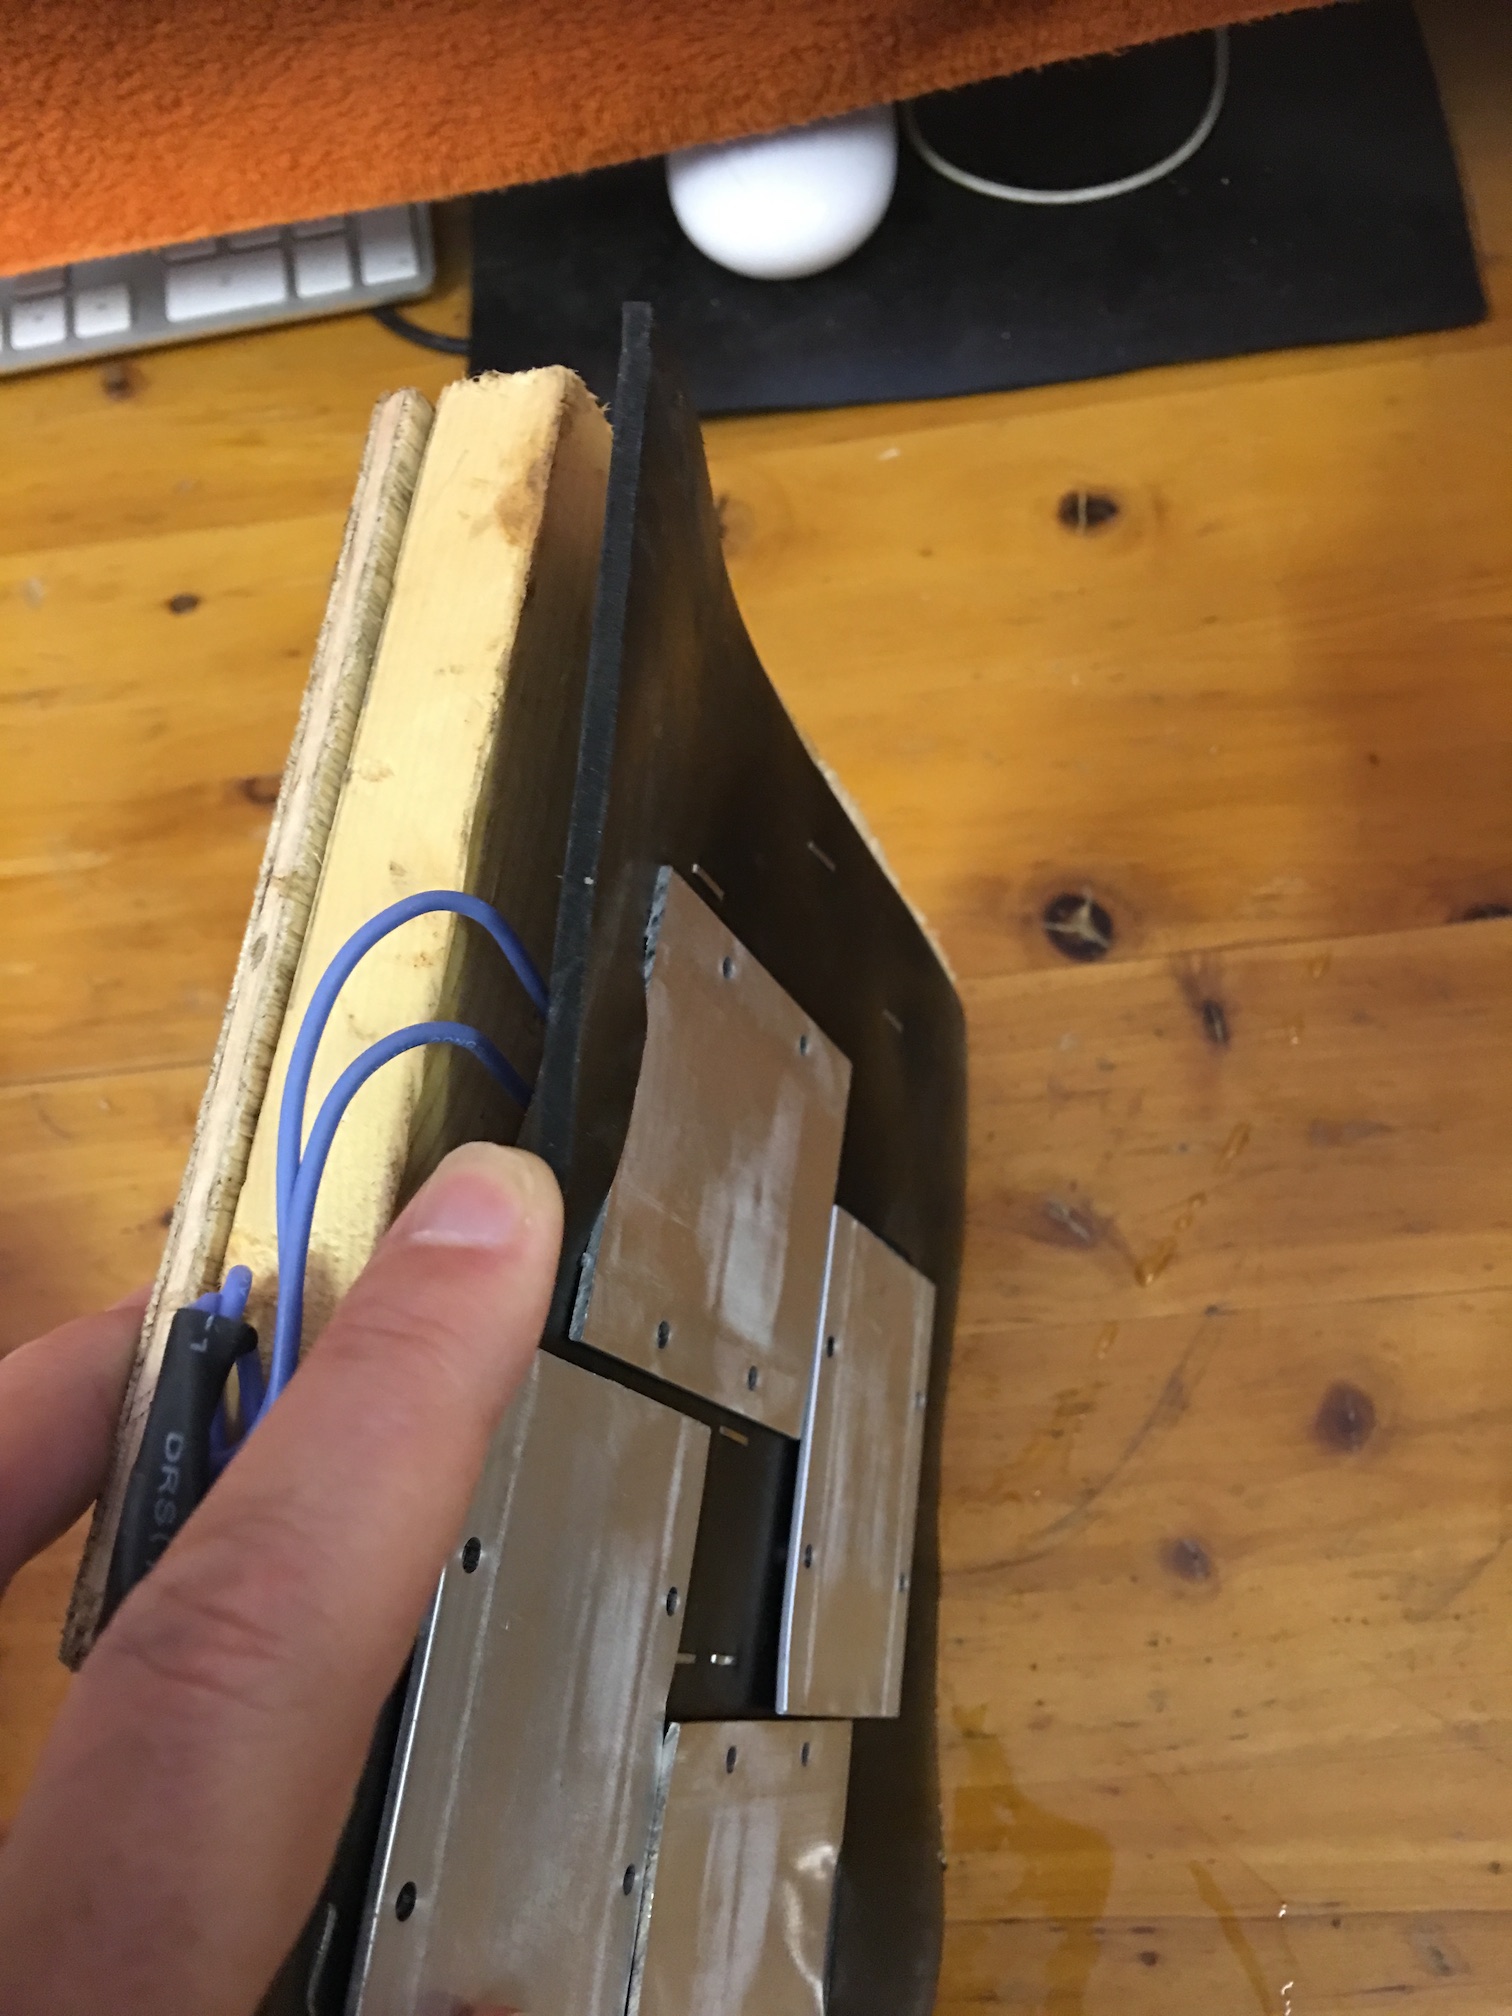
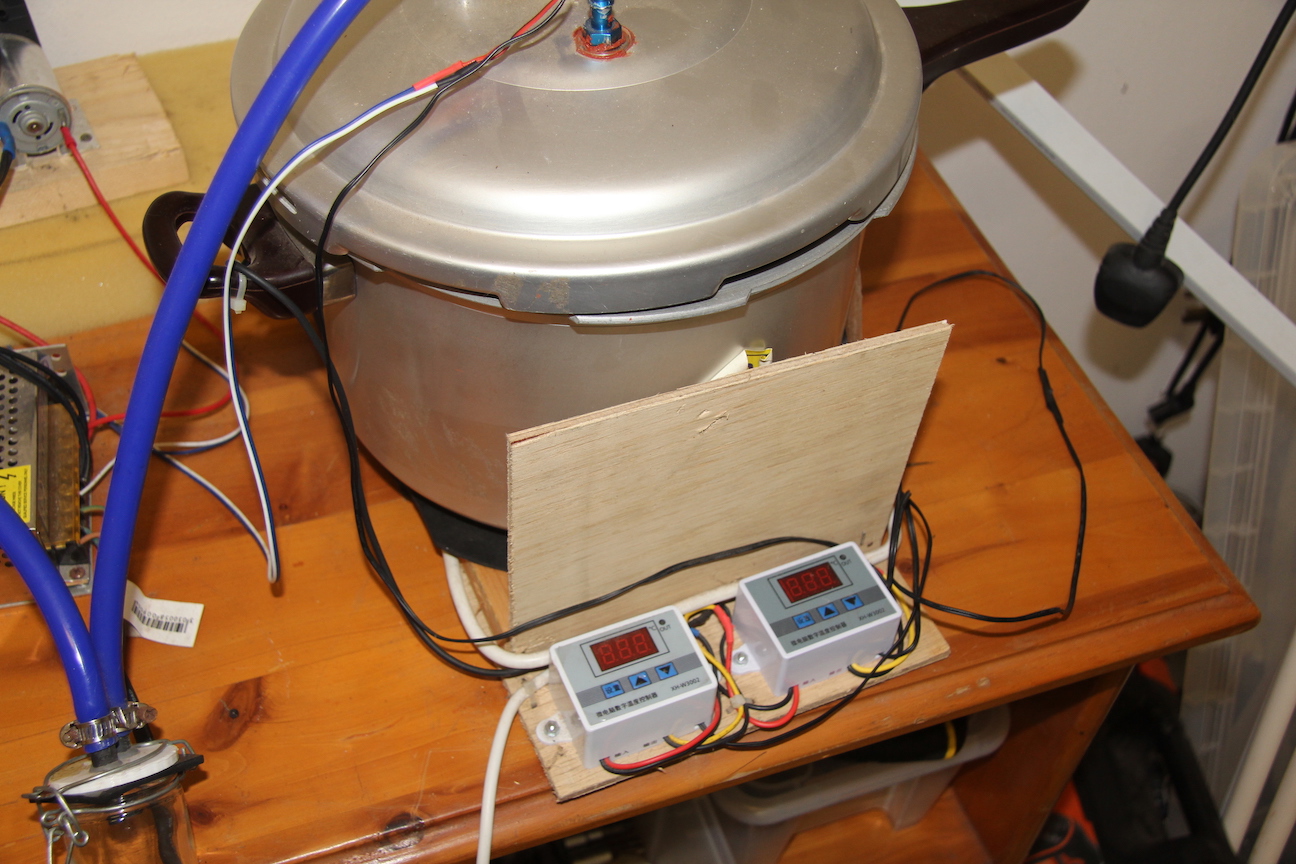
Here is the layout of the base, before I added the second thermostatic control switch:
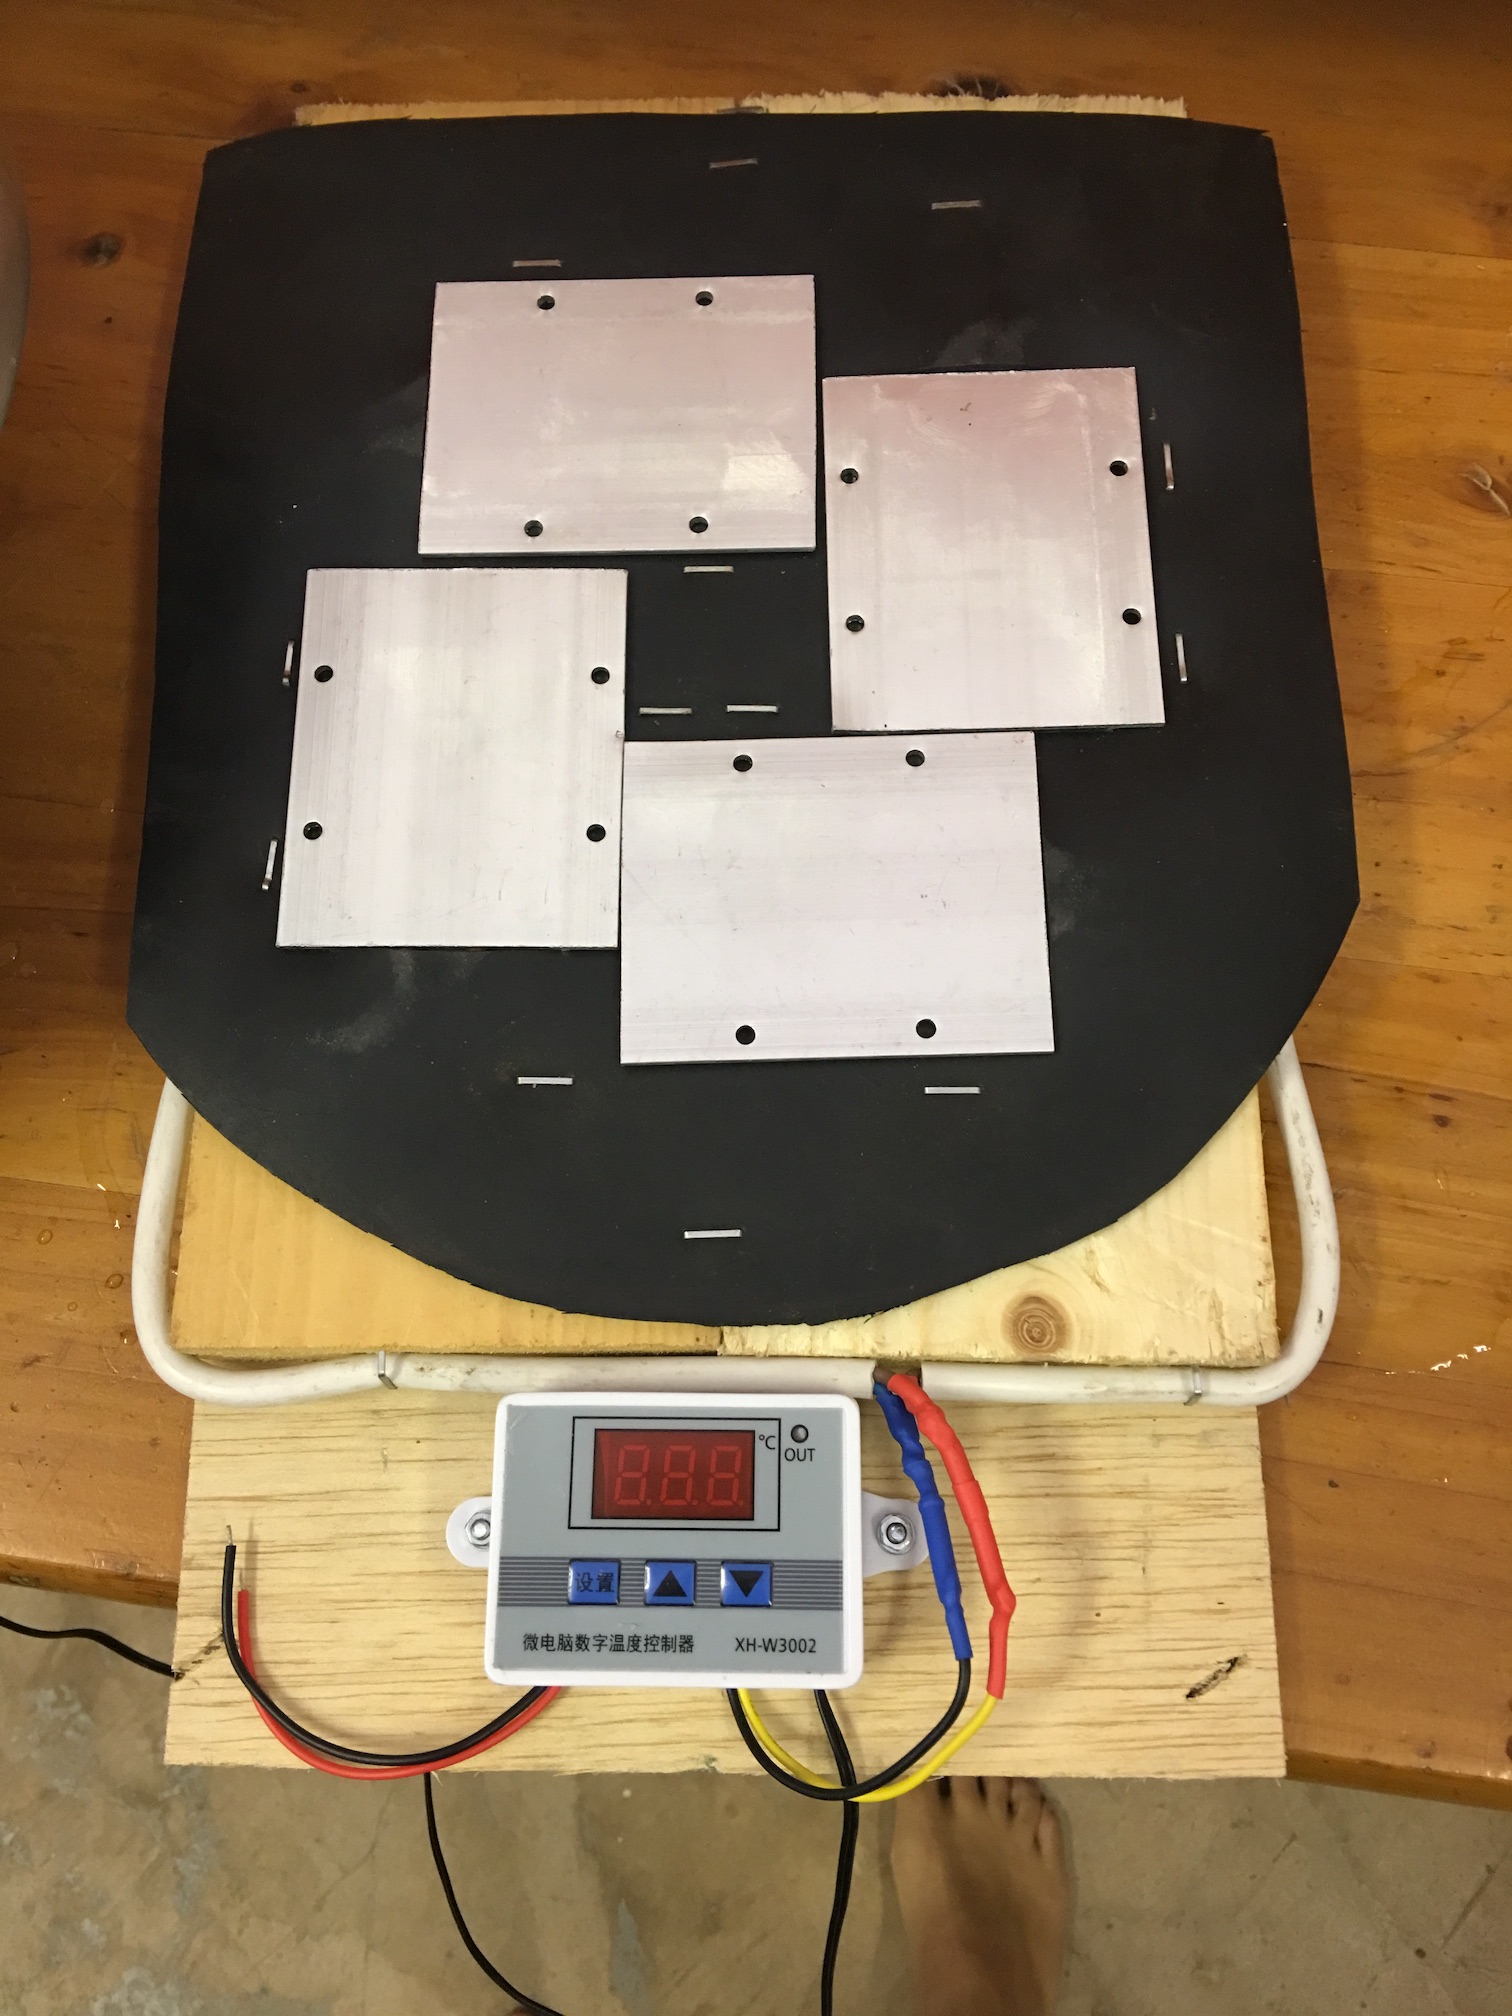
Probably hard to tell from the photos, the heating units have a raised section and a larger base plate with mounting holes. I’ve cut holes in the rubber sheeting for the raised sections to fit into.
Here’s the pumps so you know what to look for on eBay:
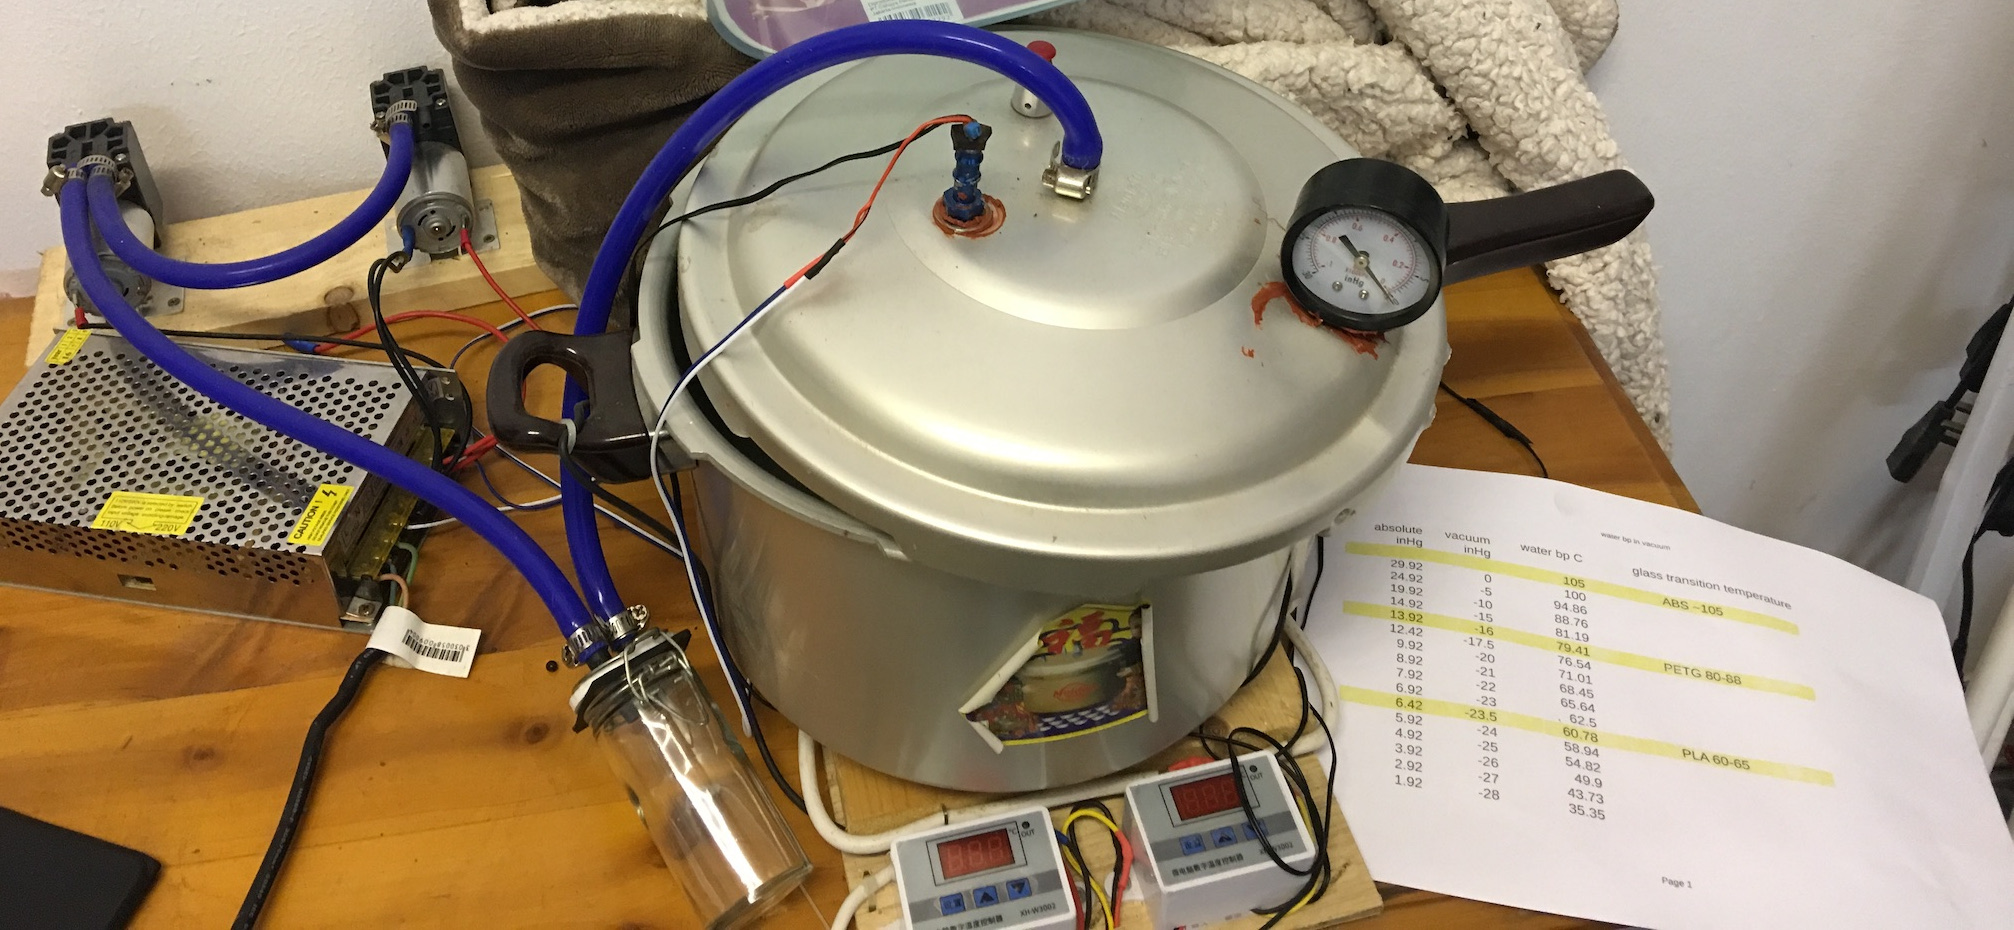
See the photo at the top of the post for the big picture layout and the routing of the vacuum tubing. Also see the v2.1 photo further below for some heat shielding added later. (v1.0 used a weaker pot which collapsed under the vacuum)
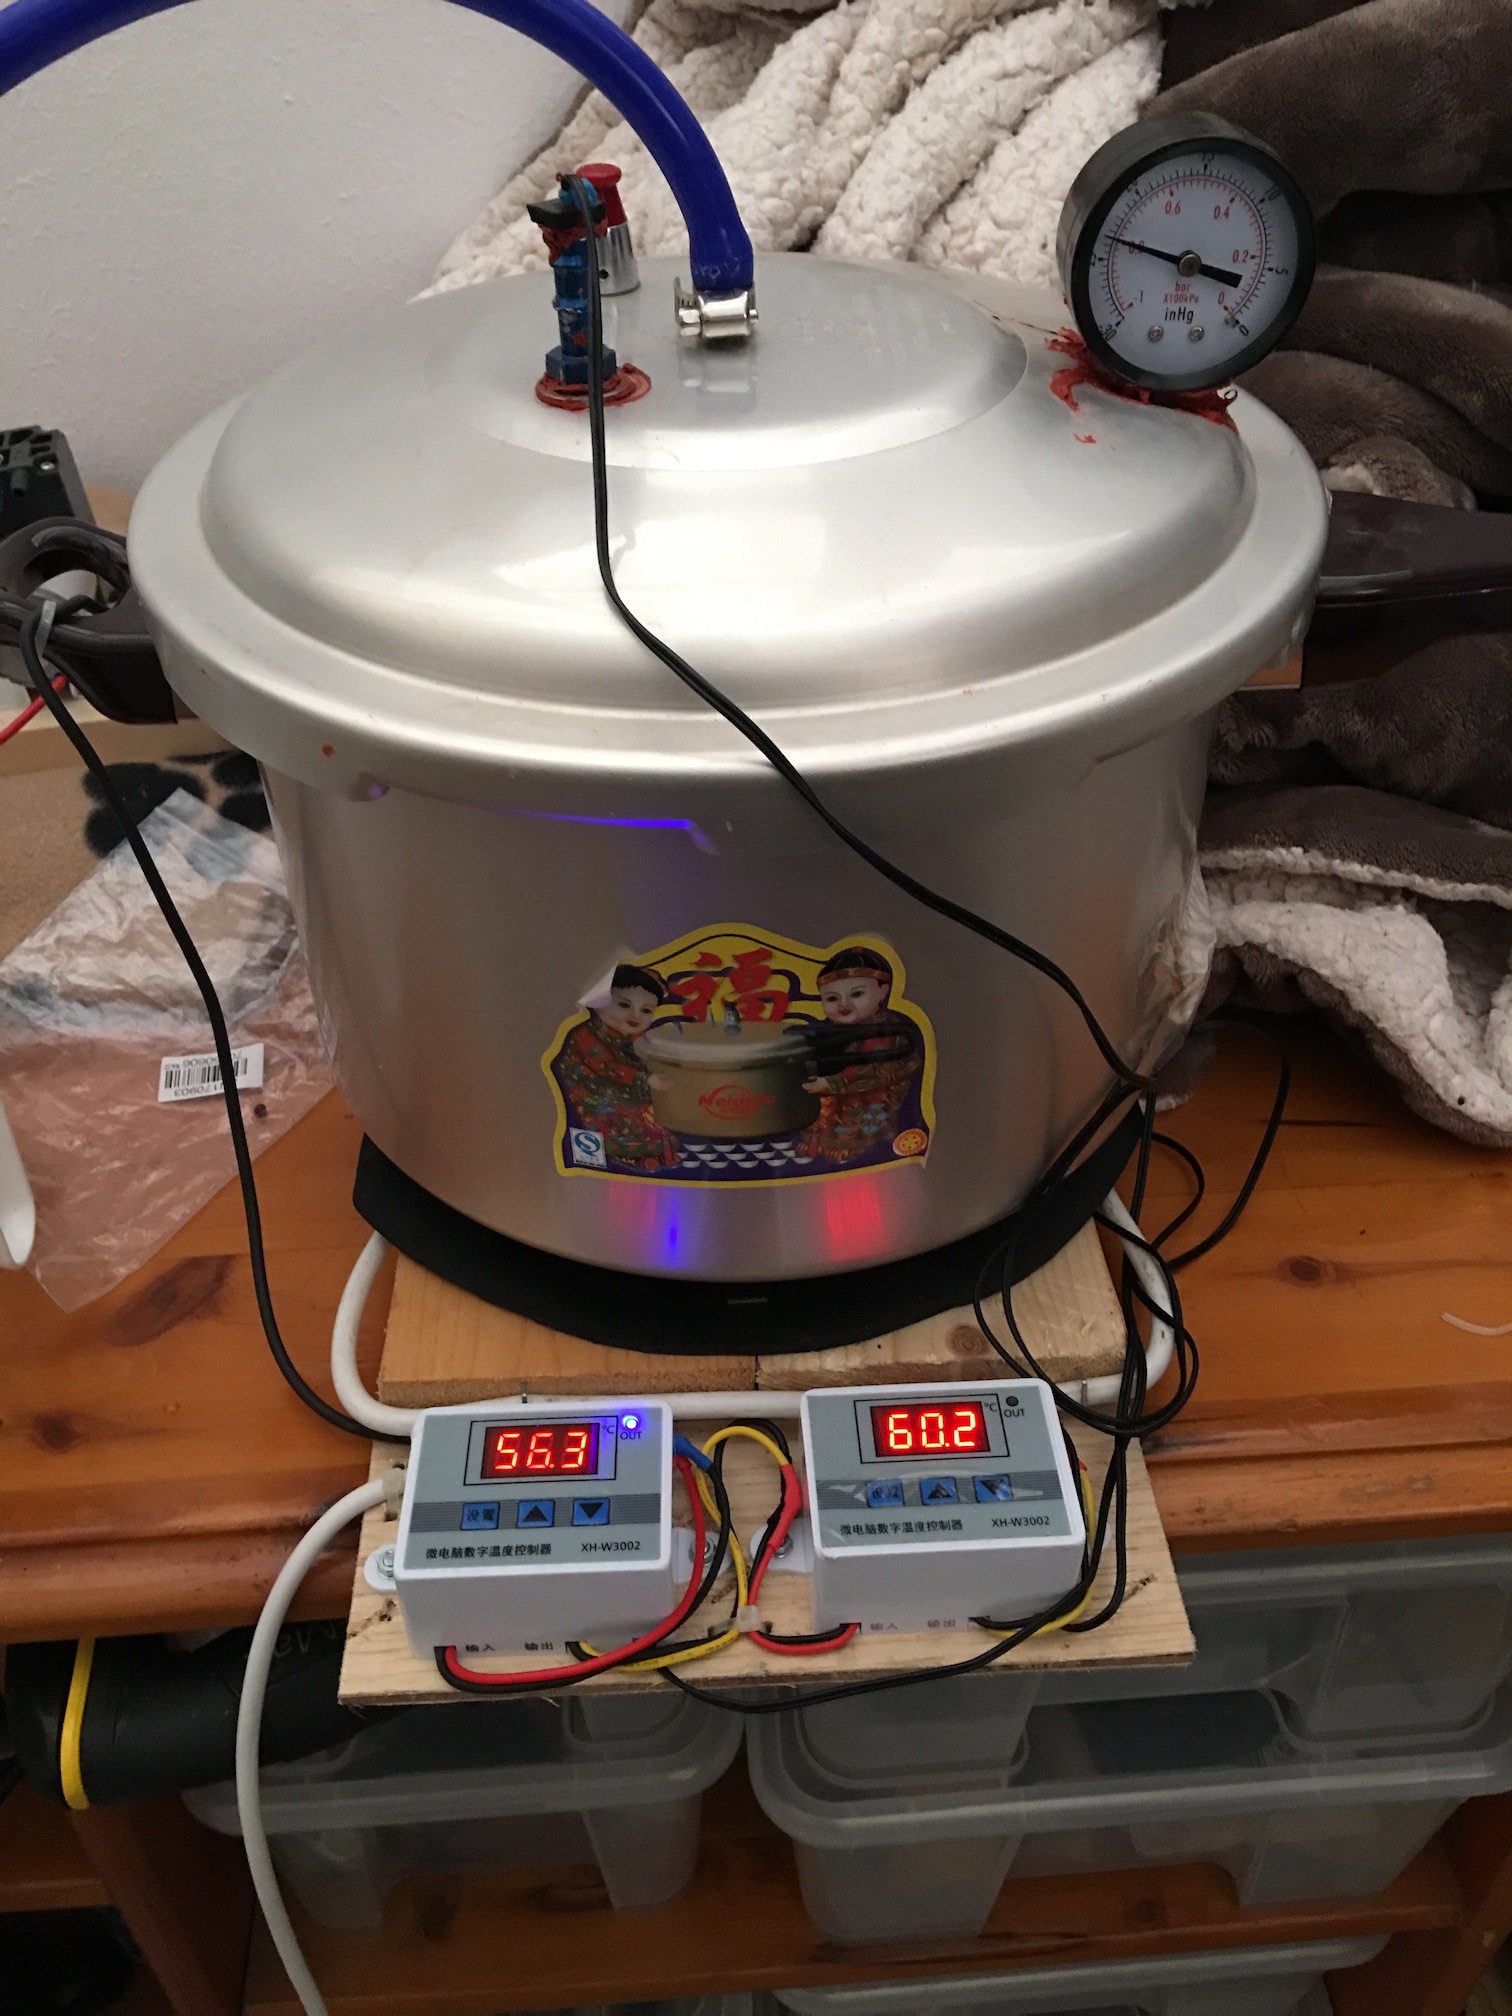
Above the main device in action. The sensor for the thermostatic control on the left is taped to the outside of the pot, while the one on the right goes through a silicone sealant filled tube and a plastic tube inside to the middle of the space. Note the readouts: the outside is at 56.4C and power is enabled (blue light), while inside is warmer (60.2C) which is over the cutoff so power is disabled. The thermostatic controls are wired in series, so both must be on to get power to the heaters. There is a lot of hysteresis in the system, so just having one sensor could easily exceed target temperatures by 10C or more.
I use a blanket over the system to trap heat inside while it is running. You can see this in some of the photos.
Here’s some more views of the top lid:
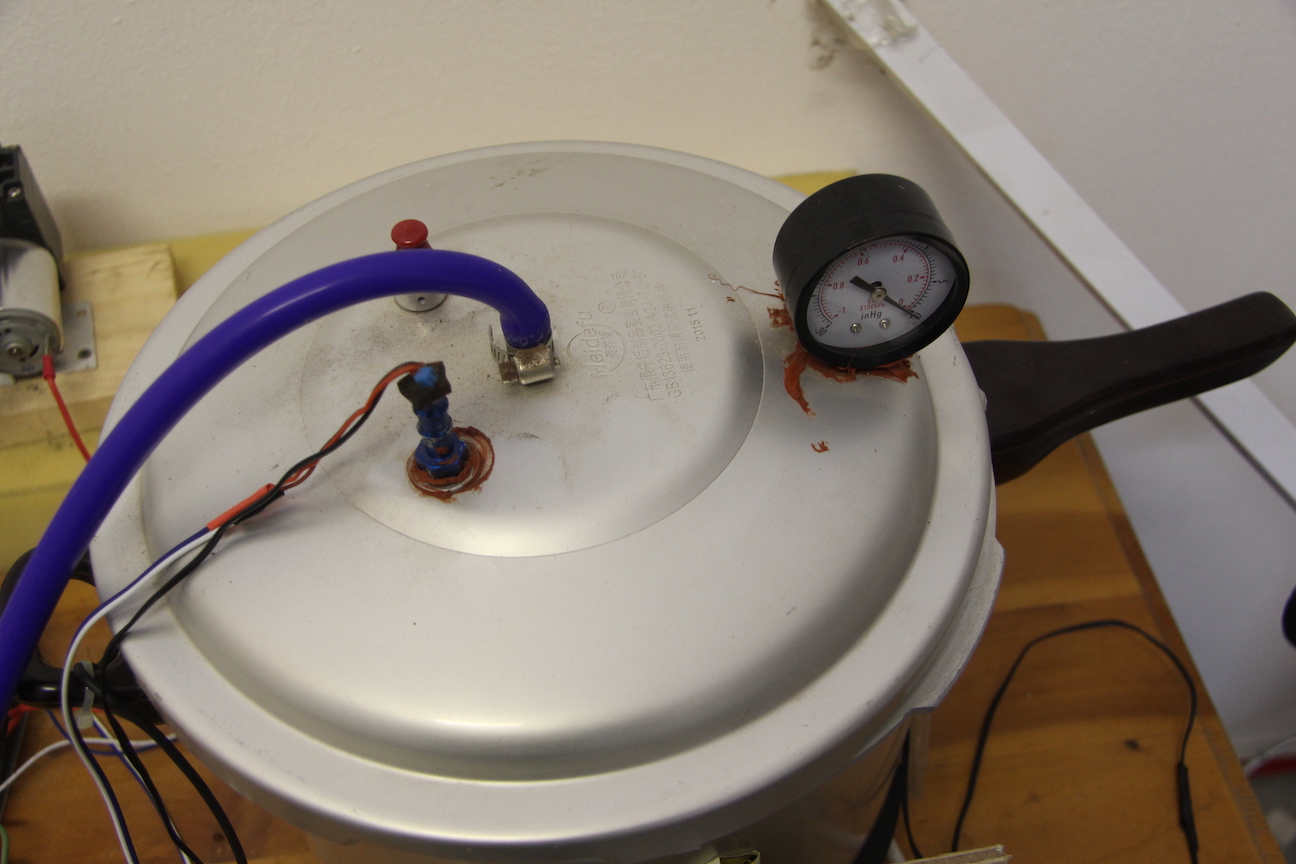
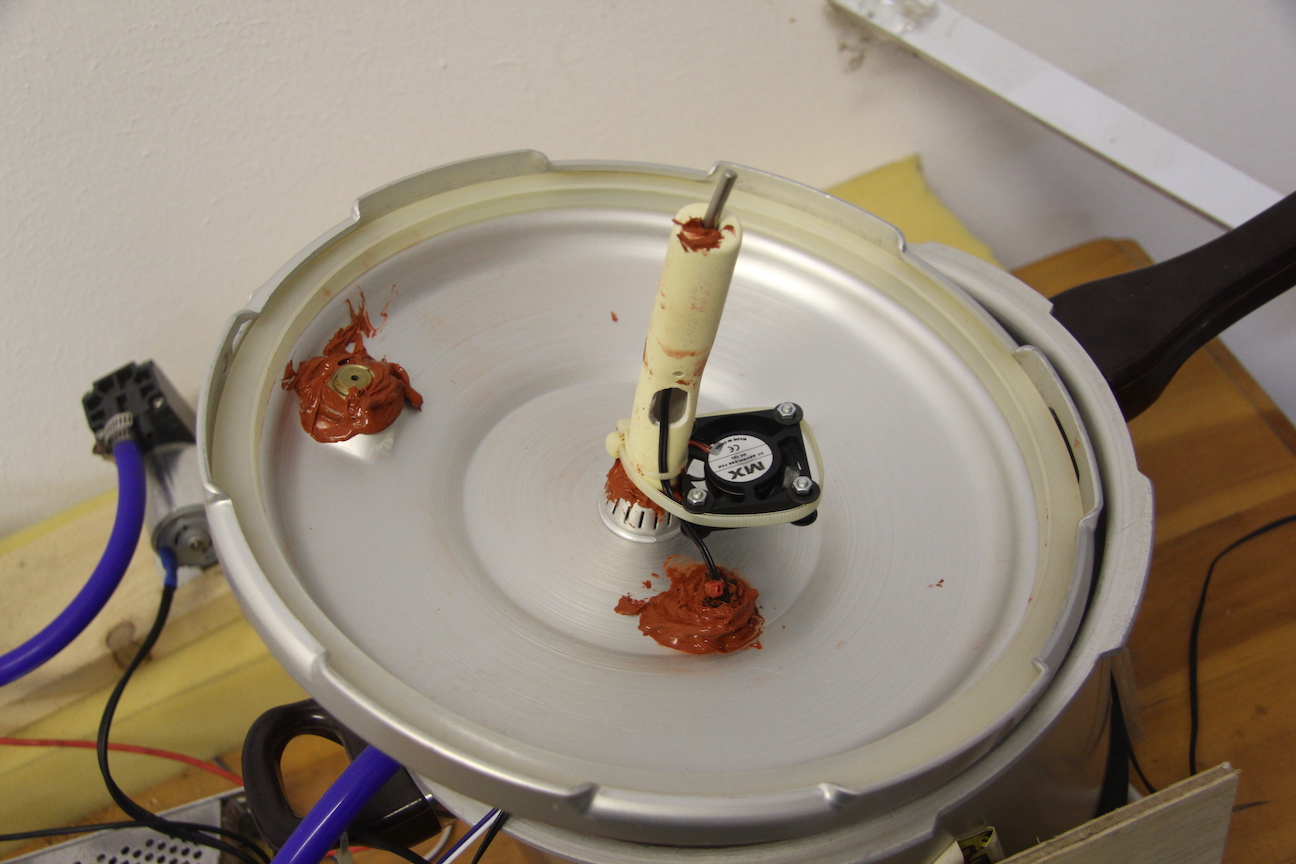
As can be seen above, there’s lots of silicone sealant plus I added a small 12V fan to shift the air around a bit inside the pot. Also the internal temperature sensor can be seen at the end of the plastic tube.
v2.1: After 6 months or so of use one of the thermostatic controls died. Could be they’re just poorly made, but seems like they can get too hot next to the pot so added the heat shield shown in the photo above.
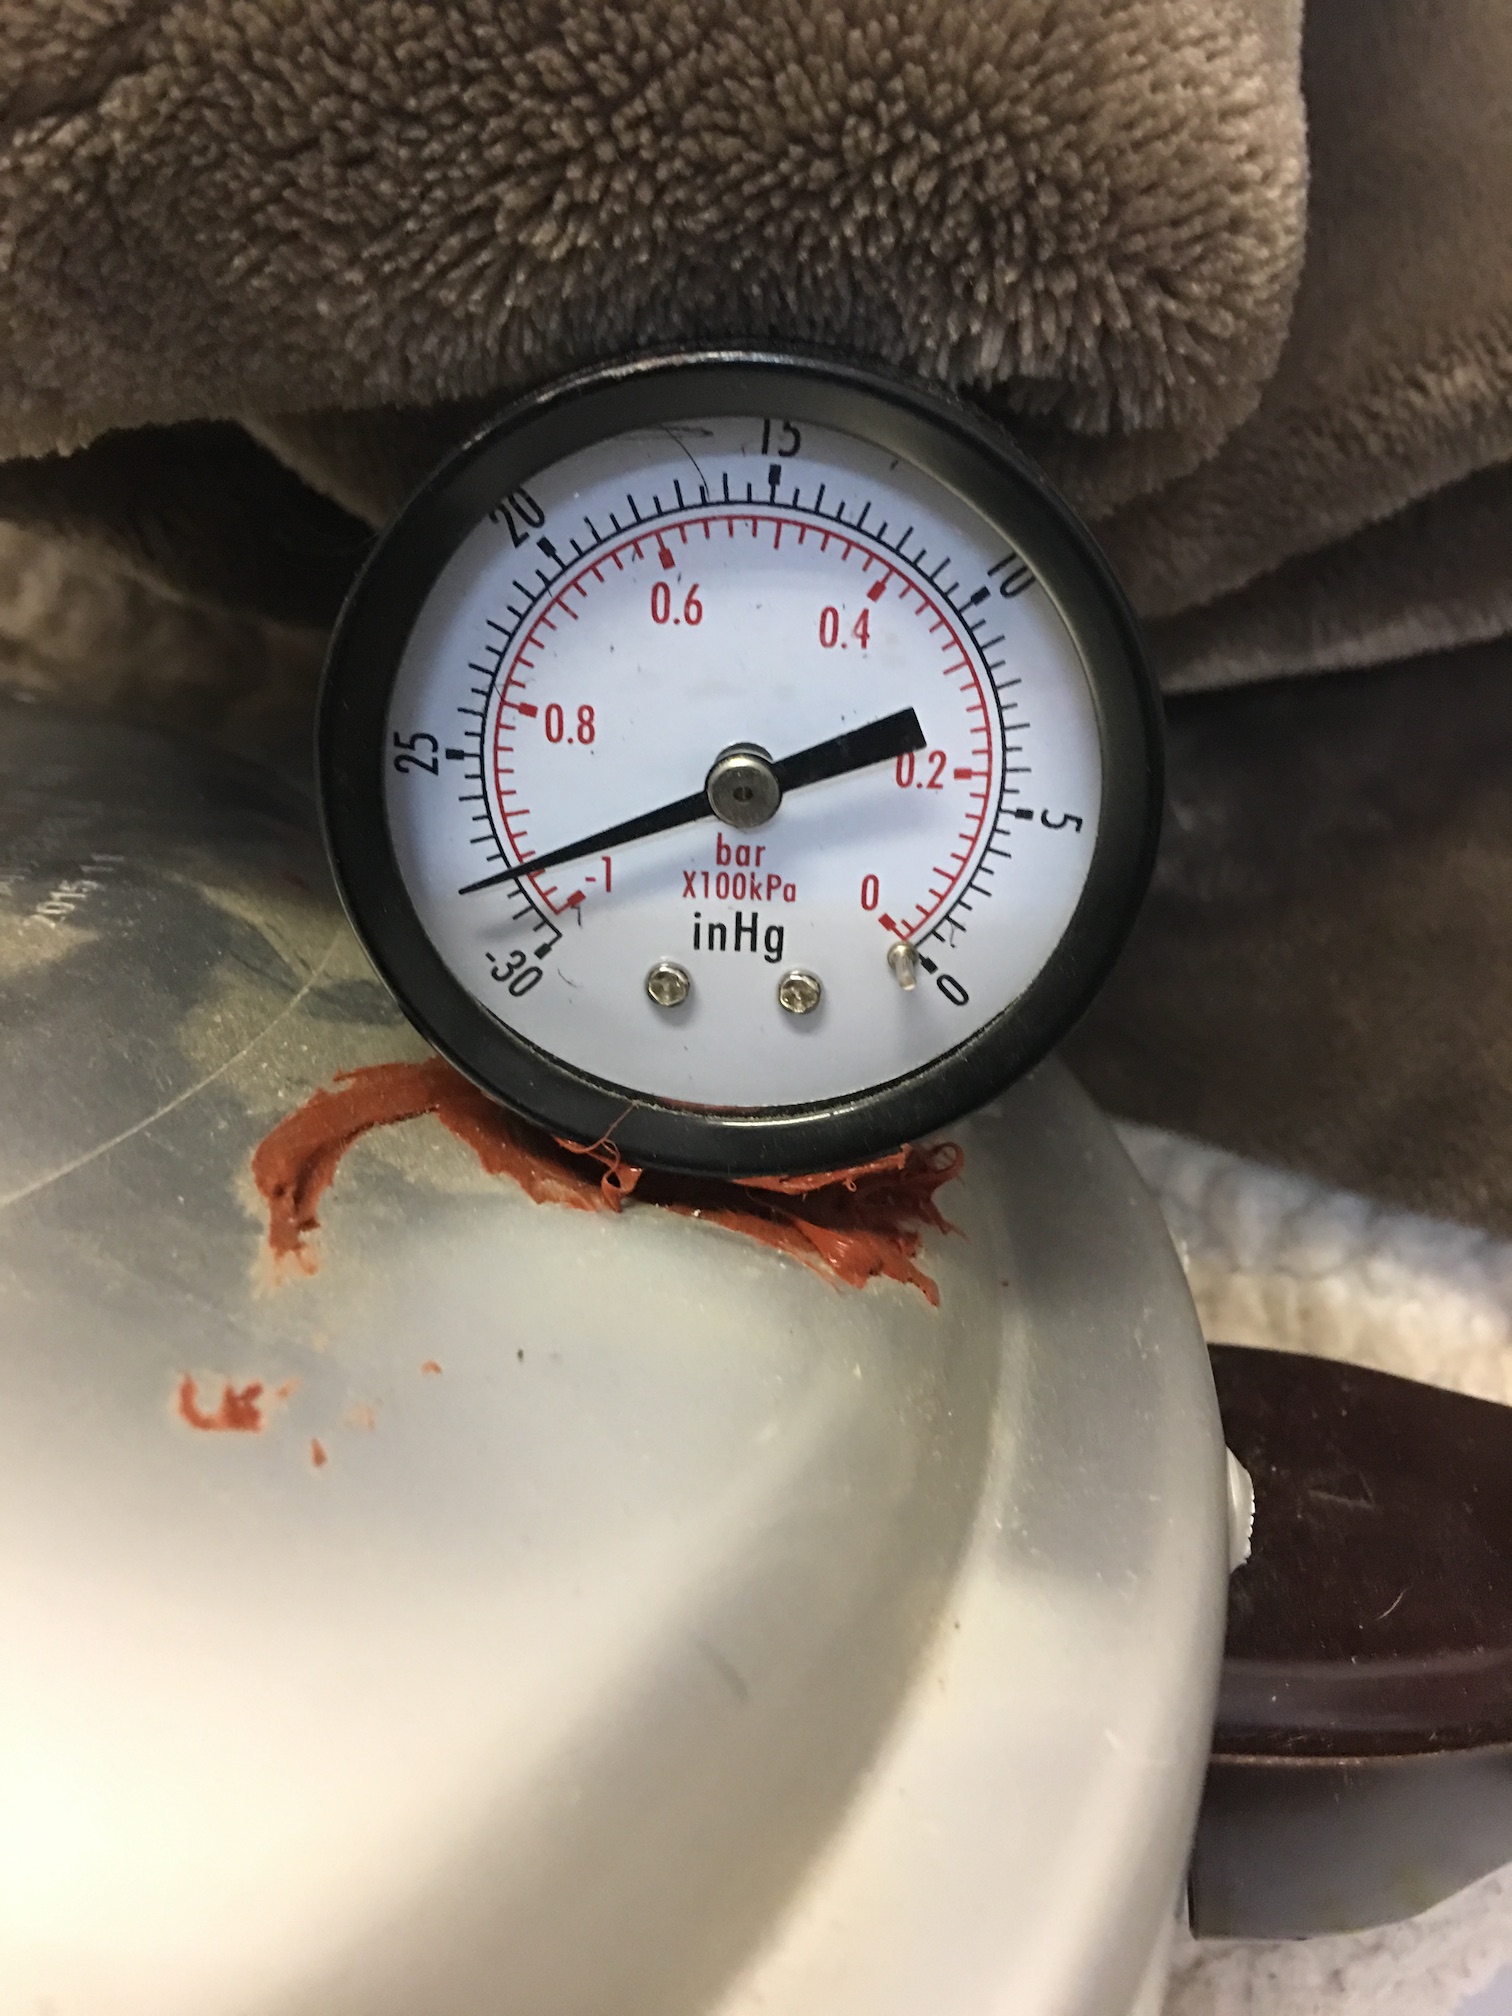
This would be the best vacuum I ever got. around -0.85 bar is more common.
For filament I’d normally only get a few mls off a spool, but enough to make a visible difference in printing. The volume above was from drying out silica gel.
Usage:
Once you’ve built a vacuum dryer, the goal is to force water into the gaseous state at a temperature that will not melt your filament.
| InHG | Bar | H2O boiling point C | Glass Transition Temp |
|---|---|---|---|
| 105 | ABS ~105 | ||
| 0 | 0 | 100 | |
| -4.92 | -0.16661 | 96 | |
| -9.23 | -0.31256 | 90 | |
| -10.24 | -0.34667 | 89 | |
| -15.94 | -0.53979 | 80 | PETG 80-88 |
| -20.72 | -0.70166 | 70 | |
| -22.05 | -0.74670 | 67 | |
| -24.04 | -0.81409 | 60 | PLA 60-65 |
| -25.98 | -0.87978 | 52 | |
| -26.28 | -0.88994 | 50 |
The boiling point vs. pressure information above was worked out from engineering toolbox and omnicalculator web pages.
As shown, the system can get sufficient vacuum to boil water even below PLA’s glass transition temperature.
Certainly you can dry filament in a regular oven at low temperatures at normal air pressure, but this should be more efficient.
Stefan from CNC Kitchen in his YouTube video “Why you need to dry your filaments” recommends
PLA 45C
PETG 65C
ABS and Nylon 80C
Wikipedia recommends silica gel be dried 1-2 hours at 120C.
For my use I stay about 10C below the relevant glass temperature in the table above for the max setting for the internal thermostat (as discussed above it creeps a few degrees above this) for 6 hours or so - I just leave it going until there doesn’t seem to be any more water coming out. I have measured 0.2-1.0% change in weight for a 1Kg spool of PETG filament after 6 hours at 70C. For silica gel I set it to 105C.